How to set up two-factor authentication on Instagram

How to set up two-factor authentication on Instagram
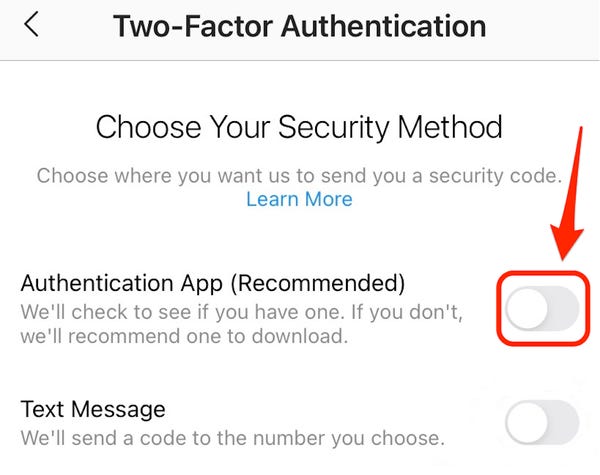
In this tutorial we will explain how you can set up two-factor authentication on Instagram. It’s one of the most, if not the most, important steps to secure your Instagram account. There are two ways to enable 2 step verification; via your phone number & a third party authentication app. We always recommend to use Google Authenticator (or another authentication app) & not your phone number, due potential “SIM swap scams” (see: Wikipedia).
How to set up two-factor authentication using Google Authenticator
- Open the Instagram application on your mobile device
- Go to your Instagram profile by clicking on the profile icon at the bottom right corner
- Select the 3 lines icon in the top right corner
- Select ‘settings’
- Select ‘security’
- Select ‘Two-Factor Authentication’
- Select ‘Get started’
- Select ‘Authentication App’
- Download Google Authenticator (Apple or Android) & click on ‘next’
- A pop-up will take you to the Google Authenticator app & asks you for the code
- Copy the code from the Google Authenticator ap & return to the Instagram app.
- Paste the code into the text field & submit
- You’re registered with the third-party app. Instagram will ask for the code from the Authenticator app, any time you log in. This will prevent hackers from getting into your account, as they will need to provide an extra code.
- Make sure you don’t lose access to the authenticator app & make a backup of your phone. In this case you won’t lose access to the code, in case anything is wrong with your phone (stolen, defect, etc.)